Where to Place Carbon Monoxide Monitors After a Gas Furnace Installation

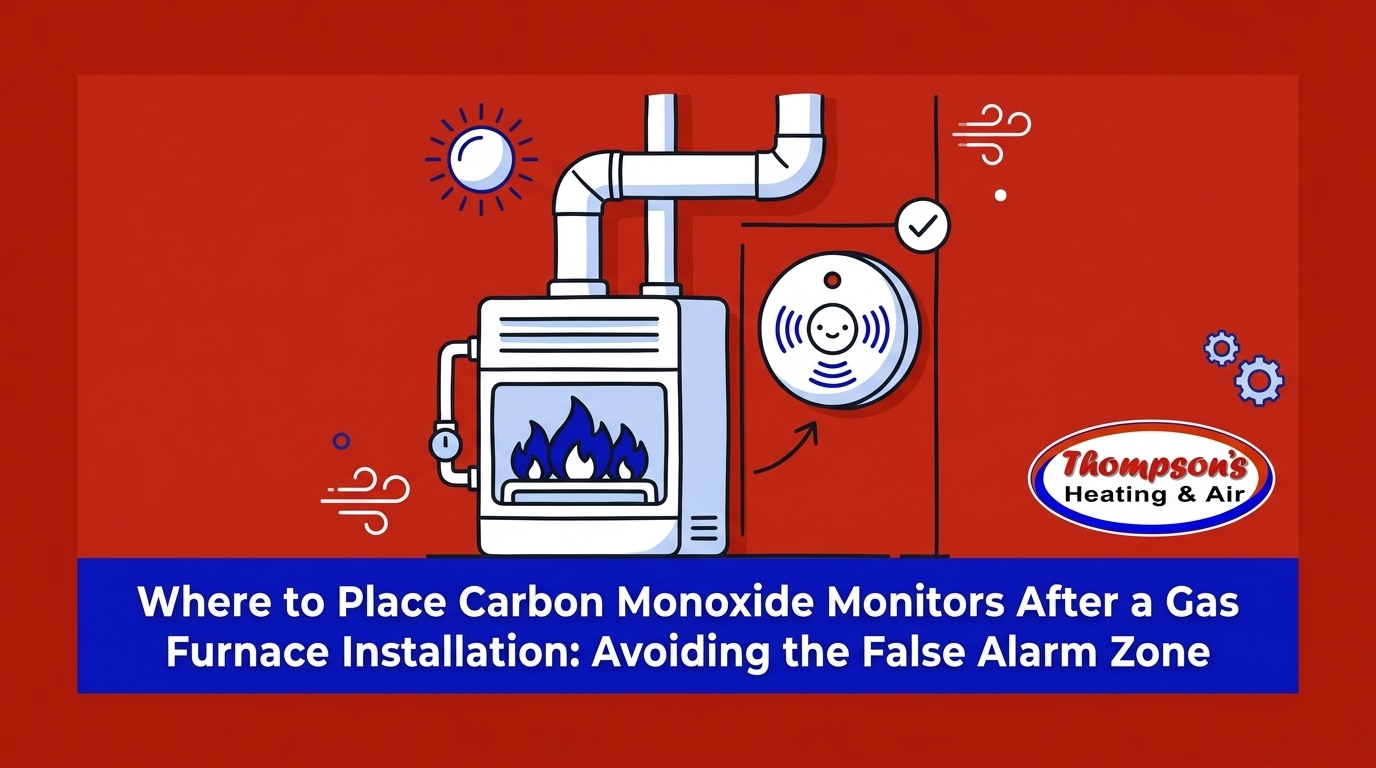
Securing Your Home: The Critical Role of Proper CO Monitor Placement
You just invested in a brand-new heating system, but the carbon monoxide alarm keeps chirping, leaving you wondering if there is a real emergency or just a frustrating glitch. Figuring out exactly where to place carbon monoxide monitors after a gas furnace installation is one of the most critical, yet frequently misunderstood, steps of securing your home. A common assumption is that placing a detector right next to the new equipment provides the fastest warning. In reality, this mistake leads directly to false alarms and unnecessary panic.
Upgrading your home's heating equipment brings undeniable peace of mind, improved efficiency, and reliable warmth. However, a modern system also requires an updated approach to safety monitoring. If you place your detectors incorrectly, you face two severe outcomes: either you suffer from alarm fatigue due to constant false alerts, or you experience dangerously delayed warnings during an actual emergency. For homeowners in Woodland CA, ensuring these devices are correctly positioned is a top priority before the cold weather sets in. During our early fall heating tune-ups, our technicians at Thompson's Heating & Air frequently see monitors placed in spots that practically guarantee false alarms.
To keep your household fully protected, you need comprehensive heating services that include proper guidance on safety equipment. The goal is to provide exact distances and room-by-room guidelines so your monitors alert you only when a genuine threat exists. By understanding the science behind how your equipment operates and how carbon monoxide travels, you can eliminate the guesswork and sleep soundly through the winter.
Understanding the 'False Alarm Zone' Near Your Gas Furnace
The problem: Homeowners frequently mount a carbon monoxide detector directly inside the utility closet or on the wall immediately outside the furnace room. The cause: They logically assume that the closer the monitor is to the potential source of a leak, the better the protection. The solution: You must respect the "false alarm zone" and install monitors well outside the immediate radius of the equipment.
The false alarm zone is the immediate area surrounding any fuel-burning appliance. When your system kicks on, a tiny, completely harmless amount of combustion gas can occasionally be released during the initial startup sequence. Before the draft inducer motor fully pressurizes the venting system to push exhaust outdoors, a microscopic puff of vapor might escape. This is a normal part of operation, but highly sensitive detectors placed too close will pick it up.
If your monitor constantly chirps every time the thermostat calls for heat, you quickly develop alarm fatigue. You might start removing batteries, ignoring the beeps, or assuming the system is just acting up again. This creates a highly dangerous situation where a genuine, sustained leak from a cracked heat exchanger is dismissed as just another nuisance alarm following your recent gas furnace installation. In our years of servicing Sacramento Valley homes, we've found that respecting this "false alarm zone" is the simplest way to keep families safe without the headache of constant chirping.
The 15-to-20 Foot Rule
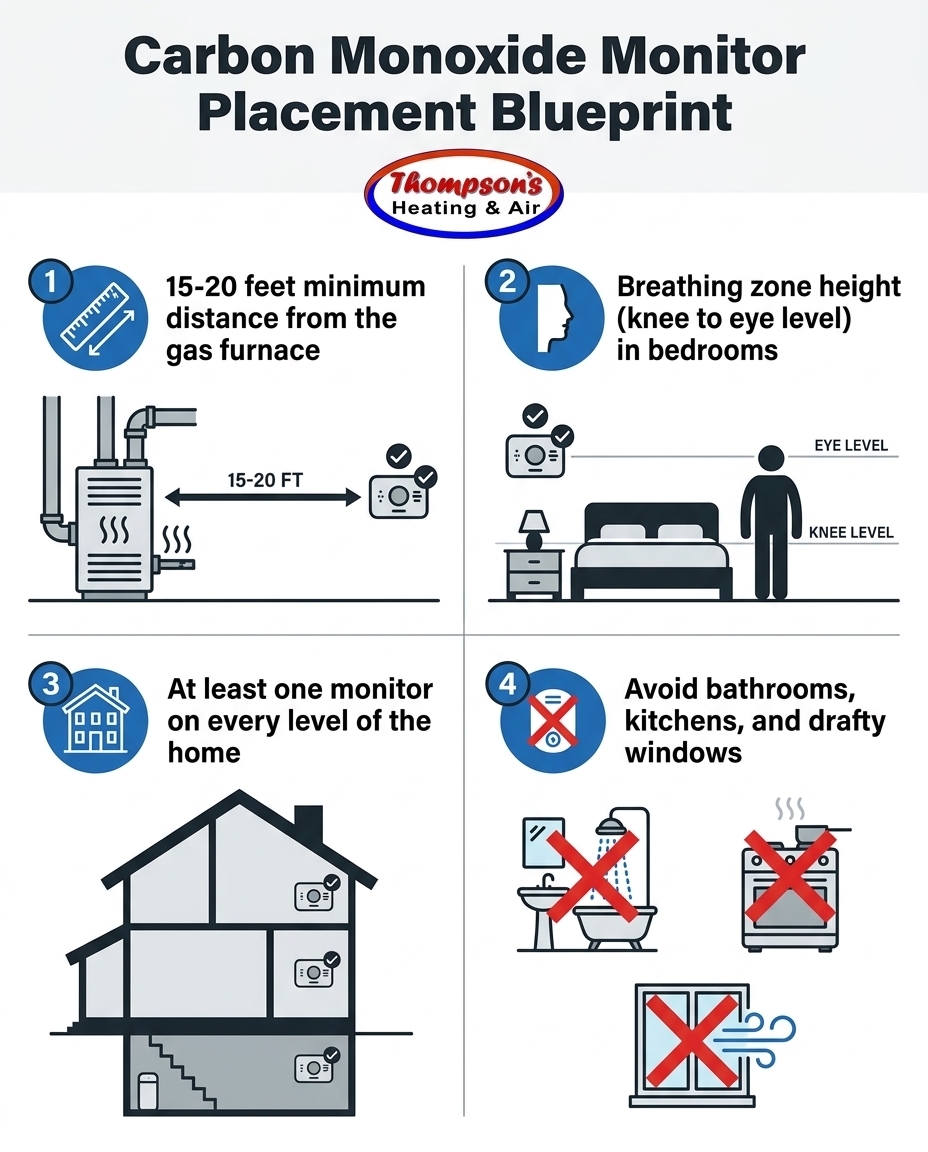
To prevent alarm fatigue while maintaining strict safety standards, you must follow the 15-to-20 foot rule. Environmental Protection Agency (EPA) and National Fire Protection Association (NFPA) guidelines strongly recommend placing monitors at least 15 to 20 feet away from the furnace. This specific distance allows those harmless, momentary startup vapors to dissipate harmlessly into the air before they ever reach the sensor.
Placing the detector exactly 15-20 feet away from the furnace ensures that if the alarm does sound, it is detecting a sustained, dangerous accumulation of gas rather than a normal operational hiccup. It is the perfect balance between early detection and everyday practicality.
Wall vs. Ceiling: Targeting the 'Breathing Zone'
One of the most persistent myths in home safety is that carbon monoxide behaves exactly like smoke. Because we are taught that smoke rises rapidly to the ceiling during a fire, many homeowners assume carbon monoxide does the exact same thing. This misunderstanding leads to monitors being placed in less-than-optimal locations.
The science of carbon monoxide: Unlike hot smoke from a fire, carbon monoxide gas is roughly the exact same weight as normal indoor air. It does not aggressively rise to the ceiling, nor does it sink heavily to the floor. Instead, it mixes evenly throughout the room, much like a drop of food coloring dispersing in a glass of water.
Because the gas mixes evenly, you need to target the "breathing zone." The breathing zone is the specific height at which occupants actually breathe while they are sleeping, sitting, or relaxing in a room. While ceiling mounts are technically acceptable and will eventually detect a leak, they are not the fastest way to protect a sleeping family.
• Weight compared to air — Smoke / Fire: Significantly lighter (when heated) — Carbon Monoxide (CO): Virtually identical to air
• Movement pattern — Smoke / Fire: Rises rapidly, pools at the ceiling — Carbon Monoxide (CO): Mixes evenly throughout the space
• Optimal detector height — Smoke / Fire: High on the wall or on the ceiling — Carbon Monoxide (CO): Knee-to-eye level (the breathing zone)
• Primary threat time — Smoke / Fire: Anytime, highly visible — Carbon Monoxide (CO): Silent, invisible, highly dangerous while sleeping
For the fastest possible detection, especially during the night, install monitors at knee-to-eye level in bedrooms. If a leak occurs while you are asleep, a monitor placed at the same height as your bed will sound the alarm much sooner than one mounted ten feet up on a vaulted ceiling. Remember to maintain that critical distance of 15-20 feet away from the furnace, even when targeting the breathing zone in adjacent rooms.
A Room-by-Room Guide to Carbon Monoxide Detector Locations
Protecting a home in Woodland CA requires more than just buying a single monitor and plugging it into the nearest outlet. You need a strategic, multi-layered approach to ensure every zone of your house is covered. Follow this room-by-room checklist to position your detectors for maximum effectiveness.
1. Sleeping Areas: The most critical placement is near where your family sleeps. Place a monitor in the hallway immediately outside all bedroom doors. For enhanced safety, install an additional monitor directly inside each bedroom, ensuring they are positioned at breathing zone height.
2. Multi-Level Coverage: Carbon monoxide can become trapped on a single floor depending on your home's airflow. Ensure at least one monitor is installed on every single level of the home, including finished basements and livable attics.
3. Living Spaces: Position monitors in main living areas where families spend the bulk of their evening hours, such as the living room or den. Ensure these units are free from obstructions—do not hide them behind heavy curtains, large bookshelves, or bulky furniture that could block airflow to the sensor.
4. Integration with IAQ: Proper placement works hand-in-hand with broader indoor air quality solutions. A well-ventilated home with properly placed monitors ensures that you are breathing clean, safe air year-round.
Areas to Strictly Avoid
Just as important as knowing where to put your monitors is knowing where to keep them away from. Poor placement can ruin the internal sensors or trigger constant false alarms.
• Kitchens: Never place a monitor directly in the kitchen. Gas stoves, ovens, and high humidity from boiling water will cause false readings and degrade the sensor.
• Bathrooms: Extreme humidity from hot showers can permanently damage the electrochemical sensors inside the alarm.
• Drafty zones: Keep monitors away from direct sunlight, open windows, exterior doors, and strong drafts from supply air vents, which can blow the gas away from the sensor.
• Dead air spaces: Avoid the very peaks of vaulted ceilings or the sharp corners where walls meet the ceiling, as air does not circulate well in these pockets.
Why Tightly Sealed Homes Require Heightened Vigilance
The problem: Modern homes are exceptionally well-insulated, which is fantastic for energy bills but potentially hazardous for indoor air quality. The cause: As temperatures drop, homeowners naturally shut their windows, lock their doors, and apply weatherstripping to trap the heat inside. The solution: You must rely on properly placed CO monitors because your home no longer breathes naturally.
During the Sacramento Valley's cooler winter nights, homes are sealed tight to retain heat. This tight sealing drastically reduces the natural exchange of indoor and outdoor air. In decades past, older, draftier homes allowed a certain amount of fresh air to constantly filter through the walls and window frames. Today, modern building envelopes lock the air inside.
This lack of ventilation connects directly to a much higher risk of carbon monoxide accumulation if a heating system malfunctions. If a vent pipe becomes disconnected or a heat exchanger develops a crack, the toxic gas has nowhere to escape. It builds up rapidly inside the sealed environment. Because you cannot rely on drafts to carry the gas away, proper monitor placement becomes your only reliable safeguard.
This is why early fall heating prep is so vital. Before you lock down your house against the cold, you need to verify that your safety nets are in place. Combining correct monitor placement with routine heating maintenance ensures that your tightly sealed home remains a safe haven, rather than a hazard, throughout the winter season.
Maintenance and Lifespan of Your Carbon Monoxide Detectors
Buying the right detector and placing it in the perfect spot is only half the battle. You also have an ongoing responsibility to maintain these devices. A common misconception is that carbon monoxide monitors last forever as long as you change the batteries. In reality, the internal components have a strict expiration date.
The electrochemical sensors inside these alarms degrade over time due to exposure to everyday indoor air, humidity, and minor household chemicals. Even if the battery is brand new and the test button beeps loudly, an expired sensor will fail to detect a lethal gas leak. The standard replacement timeline is typically 5 to 7 years, depending heavily on the specific manufacturer's guidelines printed on the back of the unit.
To keep your family safe, establish a strict maintenance routine during your early fall heating prep:
• Monthly testing: Press the test button on every unit in the house once a month. This verifies that the horn, battery, and circuitry are functioning.
• Annual battery replacement: Replace the batteries at least once a year. A great habit is to swap them out when you adjust your clocks for daylight saving time.
• Vacuuming: Gently use a soft brush attachment on your vacuum to remove dust and pet dander from the sensor vents every few months.
• Check the date: Look at the manufacturing date stamped on the back of the device. If it is older than 7 years, throw it away and purchase a replacement immediately.
Comprehensive Safety Standards During Furnace Upgrades
While carbon monoxide monitors are absolute necessities, they are ultimately your last line of defense. The best defense against this invisible threat is a flawless equipment installation that prevents leaks from ever occurring in the first place. A monitor only alerts you after something has gone terribly wrong; a professional installation ensures things go right.
When upgrading your heating equipment, the integrity of the installation process dictates the safety of your home. Professional venting is paramount. The flue pipes must be perfectly pitched, securely fastened, and properly sealed to ensure exhaust gases are drawn outside. Gas lines must be rigorously secured and leak-checked. Furthermore, comprehensive heat exchanger verification is required to ensure the combustion chamber is fully intact before the system is fired up for the season.
These protocols are an extension of our strict, life-saving safety standards at Thompson's Heating & Air. Proper monitor placement and rigorous installation procedures go far beyond basic functionality—they are about protecting your household. When our team recently completed a new equipment installation for a local Woodland CA family, our focus wasn't just on getting the warm air flowing. We prioritized thoroughness and rigorous follow-up, ensuring their monitors were perfectly positioned to back up our flawless installation, leaving the customer deeply impressed with the reliability of the setup.
A reliable crew treats safety as the primary objective, not an afterthought. This includes testing furnace heat exchangers for safety and ensuring every single component meets strict operational codes. Your monitors are critical backups, but the structural integrity of your newly installed equipment is what truly keeps the air clean.
Prioritize Your Family's Safety This Heating Season
Taking the time to position your monitors correctly ensures early detection without the constant, frustrating nuisance of false alarms. By respecting the 15-to-20 foot distance rule away from your new equipment and targeting the breathing zone in your sleeping areas, you create a robust safety net for your household.
As part of your early fall heating prep, take a walk through your home and verify your current setup. Check the expiration dates on your alarms, test the batteries, and make sure they are positioned away from drafty windows and humid bathrooms. Do not wait until the first freezing night to discover your safety equipment is out of date or improperly installed.
If you have recently upgraded your system or have concerns about your current ventilation setup, reach out to our professional team. Ensuring your home's safety setup is verified before continuous heating is required gives you the ultimate peace of mind all winter long.
Frequently Asked Questions
How far from a furnace should a carbon monoxide detector be?
You should place a carbon monoxide detector at least 15 to 20 feet away from your furnace. This distance prevents false alarms caused by the tiny, harmless amounts of combustion gas that can escape during the normal startup cycle. Keeping it outside this immediate radius ensures it only alerts you to genuine, sustained leaks.
Where should you not put a carbon monoxide detector?
You should never place a detector in kitchens, bathrooms, or extremely drafty areas. Kitchens have gas stoves that can trigger false readings, and the high humidity from bathroom showers can permanently damage the internal sensors. Additionally, keep them away from open windows, exterior doors, and direct airflow from heating vents.
Should a CO detector be placed high or low on the wall?
A CO detector is best placed at knee-to-eye level, often referred to as the "breathing zone." Because carbon monoxide mixes evenly with indoor air rather than rising like smoke, placing it at the height where you breathe provides the fastest detection. This is especially critical in bedrooms where you want the alarm near the level of your bed.
Can a carbon monoxide detector be placed on the ceiling?
Yes, you can place a carbon monoxide detector on the ceiling, and it will eventually detect a leak as the gas mixes throughout the room. However, ceiling placement is not the fastest way to detect a leak for a sleeping individual. If you choose a ceiling mount, avoid the very peaks of vaulted ceilings where dead air can become trapped.
Do I need a carbon monoxide detector in my basement if my furnace is there?
Yes, you absolutely need a detector in the basement, even if your furnace is located there. Just ensure you follow the rule of keeping the monitor 15 to 20 feet away from the heating equipment. Having one in the basement provides an early warning if a leak originates from the utility area before the gas spreads to the upper floors.
Why does my carbon monoxide detector go off when the heat turns on?
If your detector goes off every time the heat turns on, it is likely installed too close to the furnace. During the initial startup sequence, a very small, harmless puff of gas can escape before the exhaust system fully pressurizes. Moving the detector 15 to 20 feet away usually resolves this false alarm issue while maintaining your safety.



.avif)
.avif)
.png)
